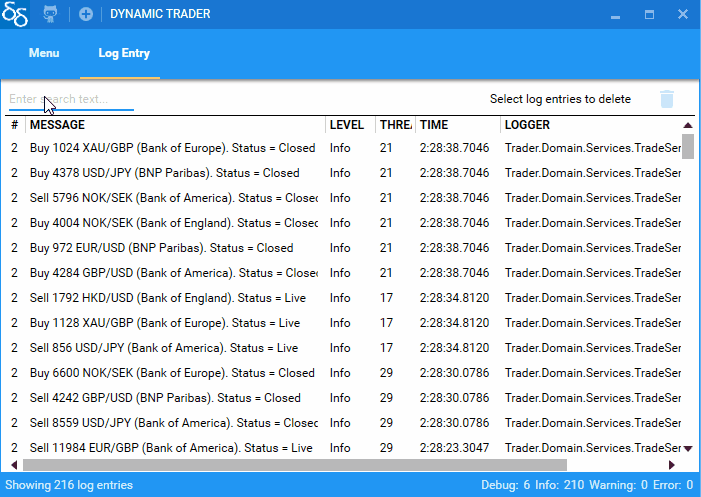
Log Entry Viewer
In this post I show how to create a log entry viewer which uses both Dynamic Data and ReactiveUI. This example screen allows viewing, filtering and removal of log entry items from memory.
There are several features which I hope act as a good example of dynamic data, reactive ui and where reactive ui and dynamic data can compliment each other. This post is long as there is loads of explanation required yet the implementation is reasonably easy and straight forward.
All the code is in the demo project is here Dynamic data demo project on GitHub
The main view model is here LogEntryViewer.cs
The log entry service code LogEntryService.cs
Apart from some domain objects and a little xaml, the above classes consisting of a few hundred lines of code is all that is required to implement the screen. It is easy once you understand a few key concepts about dynamic data and a few key concepts about reactive ui. I hope after you read this article and gone though the code, you will think the same.
1. Create an log entry observable
We need to get a reactive log stream of log entry elements. Using Log4Net we can create a custom appender see ReactiveLogAppender.cs. The appended publishes each log entry to a static subject ISubject. This subject is exposed via a static property ReactiveLogAppender.LogEntryObservable {get;} and will be used by a service to load and manage log entries.
2. Populate an observable cache and expose as a service
There are overloads in dynamic data which convert a standard rx observable into a cache. For example you could do the following which takes the log entry observable, converts it first of all into an observable change set, then caches the result. The size limiter is optional and ensures the cache does not indefinitely grow. When the size limit is reached the oldest items are removed from the internal cache. There is also an overload for time limited expiration of items.
var logEntryCache = ReactiveLogAppender.LogEntryObservable
                     .ToObservableChangeSet(le=>le.Key,limitSizeTo: 10000)
                     .AsObservableCache();
This code results in a read only observable cache. But for this example I want to expose methods to remove items, so instead I create an editable cache as follows. Since this is a cache, I have had to specify a unique key which for the log entry domain object is a counter.
var editableCache = new SourceCache<LogEntry, long>(l => l.Key);
//limit size
var sizeLimiter = editableCache.LimitSizeTo(10000).Subscribe();
//load from observable
var loader = ReactiveLogAppender.LogEntryObservable
                    .Subscribe(editableCache.AddOrUpdate);
If you want to make the cache read only, call the following method.
var readonlycache=editableCache.AsObservableCache();
For this example we will expose the cache via a service
public interface ILogEntryService
{
  IObservableCache<LogEntry, long> Items { get; }
  void Add(LogEntry items);
  void Remove(IEnumerable<LogEntry> items);
  void Remove(IEnumerable<long> keys);
}
Implementing these methods is trivial so I will not bore you will all the details of the service . The complete code is here LogEntryService.cs. This service is instantiated when the system starts as we need to catch all log entries even before the user opens the log entry view screen.
3. Create the view model, using features from both dynamic data and reactive ui
There is a lot happening in this screen so I will break it down into it’s functional parts
a) Populate a reactive list and enable user filtering
I have written extensively in previous posts about filtering and loading data into an observable collection using dynamic data observables. But to recap in dynamic data any adds, updates and removes are notified via an observable change set. Each operator is responsible for responding to a source observable, doing something and then in turn publishing it’s own change set. This way long and complicated transformation streams of data can be composed with very simple fluent and declarative code.
For the log entry example we take the data from log entry service and create an observable which processes the result and binds the data to the screen using the following code.
//this is the target list which is bound to the view
var reactiveList = new ReactiveList<LogEntryProxy>();

//a controller which allows changing a filter any time
var filter = = new FilterController<LogEntryProxy>(l => true);

 //filter, sort and populate reactive list,
var dataLoader = logEntryService.Items.Connect() //connect to the cache
     .Transform(le => new LogEntryProxy(le))     //Create a proxy
     .Filter(filter)                             //Apply a dynamic filter
     .Sort(SortExpressionComparer<LogEntryProxy>.Descending(l => l.TimeStamp))
     .ObserveOn(RxApp.MainThreadScheduler)
     .Bind(reactiveList)
     .DisposeMany()                              //automatic disposal
     .Subscribe();
The above code takes data from the log entry service, creates a proxy, sorts by most recent first, binds to the reactive list and finally when the proxy is finished with it is disposed.
The missing ingredient is the code to apply a filter. For this we need a string field with a 2 way binding to a view, and when it changes a new filter is build and applied.
//Binding to allow a user to to enter some text
 public string SearchText
 {
     get { return _searchText; }
     set { this.RaiseAndSetIfChanged(ref _searchText, value); }
 }

//using reactive ui operator to respond to any change
var filterApplier = this.WhenAnyValue(x => x.SearchText)
                .Throttle(TimeSpan.FromMilliseconds(250))
                .Select(BuildFilter)
                .Subscribe(filter.Change); //apply predicate to filter controller

 //build the predicate
 private Func<LogEntryProxy, bool> BuildFilter(string searchText)
 {
     if (string.IsNullOrEmpty(SearchText))
         return logentry => true;

     return logentry => logentry.Message.Contains(SearchText, StringComparison.OrdinalIgnoreCase)
                     || logentry.Level.ToString().Contains(SearchText, StringComparison.OrdinalIgnoreCase);
 }
Now we have an observable list of log entry items where the user can enter some search text and the result will match the text. Not terribly exciting so far, but terribly simple!
Herein we will make the the screen more interesting and create some stuff which will give user some feed back.
b) Highlight new items
As this is a log entry view items are continually being added so the first bit of user feed back is to highlight newly added rows. The solution to this is simply achieved using reactive code made better by applying a the reactive ui ToProperty() operator. I will create a flag on the LogEntryProxy which will be used to highlight new rows for 2 seconds.
To create a reactive ui property:
//the super cool lazy backing field
 private readonly ObservableAsPropertyHelper<bool> _recent;

//which is exposed like this.
 public bool Recent  {  get { return _recent.Value; }
and populated like this
_recent = Observable.Create<bool>(observer =>
                                {
                                    var isRecent = DateTime.Now.Subtract(original.TimeStamp).TotalSeconds < 2;
                                    if (!isRecent)   return Disposable.Empty;
                                    observer.OnNext(true);
                                    return Observable.Timer(TimeSpan.FromSeconds(2)).Select(_=>false).SubscribeSafe(observer);
                                }).ToProperty(this,lep=>lep.Recent);
Full code LogEntryProxy.cs
The power of ToProperty is it is lazy. It encapsulates a strategy which I have used for a long time to radically speed up reactive code where code is invoked only on demand, yet I had never encapsulated the concept so well. This is why it is one of my favourite parts of RXUI,
As a practical explanation, if I opened a list with 10,000 items where each row has an observable then 10,000 observables are created as part of loading the list even though a user can only see about 30 at the time. This is clearly performance and memory intensive. In the trading systems which I write each row can have dozens of observations on each proxy so only loading what is required when it is required is a very powerful strategy indeed.
The only more efficient performance and memory strategy which could be deployed is to make observables visibility aware meaning they can be hydrated and de-hydrated on demand. This requires a higher level of control i.e. some form of controller which perhaps I will write about in the future. But not now.
The resulting flag on the proxy can be used to apply a simple xaml trigger in wpf, enabling the recently added rows to be highlighted
<Style TargetType="{x:Type ListViewItem}" BasedOn="{StaticResource MetroListViewItem}">
    <Style.Triggers>
     <DataTrigger Binding="{Binding Recent}" Value="True">
             <Setter Property="Background" Value="{DynamicResource SecondaryAccentBrush}"/>
         <Setter Property="Foreground"  Value="{DynamicResource SecondaryAccentForegroundBrush}"/>
     </DataTrigger>
    </Style.Triggers>
</Style>
I’ve got to be honest here, I have no idea how I would apply the above trigger using reactive ui binding capabilities, If anyone can let me know, then please do so,
c) Create a delete command and provide some user text
In the example, the user can delete log entry items. So we need a command which can be enabled or disabled according to whether items are selected. The starting point is I created a controller that manages which items are selected by exposing an observable collection of selected items. SelectionController.cs and it’s implementation is not part of what I am trying to illustrate so I will profer no extra explantion about it.
Knowing what items are selected enables us to build the delete command.
The first task is to convert the observable collection into a strongly typed observable change set which provides an observable of adds, updates and removes. Dynamic data provides an operator for this out of the box.
//create the selection controller. This is bound using an attached property
var selectionController = new SelectionController()

//Selected property is ObservableCollection<object>, so convert the select items into an observable change set of log entries
var selectedItems = selectionController.Selected.ToObservableChangeSet().Transform(obj => (LogEntryProxy)obj);
This observable can be directly converted into a command using a combination of dynamic data’s QueryWhenChanged operator and reactive ui’s ToCommand operator.
//make a command out of selected items, enabling the command when there is a selection
 var deleteCommand = selectedItems
                          .QueryWhenChanged(query => query.Count > 0)
                          .ToCommand();
QueryWhenChanged exposes the inner items of the list when any change has occurred and it returns an observable of whatever data is returned. In this example query.Count>0 is a boolean so the operator returns a boolean observable which enables the command conversion.
This command can now be directly bound to a button. It will be enabled only when items are selected. However so far we are doing nothing when the command is invoked so we must subscribe to the reactive command as follows.
//Assign action when the command is invoked
 var commandInvoker =  this.WhenAnyObservable(x => x.DeleteCommand)
          .Subscribe(_ =>
          {
              //do the code to remove items from LogEntryService
          });
Just one finishing touch for the delete operation, we could do with a message tailored from the user selection. Again I will use the same QueryWhenChanged operator but this time convert the resulting string observable to a property.
var deleteItemsText = selectedItems.QueryWhenChanged(query =>
       {
           if (query.Count == 0) return "Select log entries to delete";
           if (query.Count == 1) return "Delete selected log entry?";
           return string.Format("Delete {0} log entries?", query.Count);
       })
       .StartWith("Select log entries to delete")
       .ToProperty(this, viewmodel => viewmodel.DeleteItemsText);

  //deleted items property
   public string DeleteItemsText    { get { return _deleteItemsText.Value; }   }
A simple binding to DeleteItemsText can now display the appropriate message.
d) Fade out deleted items
The next visual feedback to apply is to fade out when an item is deleted. Instead of removing an item immediately it will gradually fade out and then be removed.
Translated into code, this means each removed item needs to be delayed for a period, and upon the delay period commencing, a flag should be set on the object which will tell the view to run a fade out transition. There are many solutions to this problem but I found the most functional was to create a dynamic data based custom operator. I came up with an extension.
public static IObservable<IChangeSet<TObject, TKey>> DelayRemove<TObject, TKey>(this IObservable<IChangeSet<TObject, TKey>> source,  TimeSpan delayPeriod, Action<TObject> onDefer)
{
   if (source == null) throw new ArgumentNullException("source");
   if (onDefer == null) throw new ArgumentNullException("onDefer");

   return Observable.Create<IChangeSet<TObject, TKey>>(observer =>
   {
       var locker = new object();
       var shared = source.Publish();
       var notRemoved = shared.WhereReasonsAreNot(ChangeReason.Remove)
       .Synchronize(locker);

       var removes = shared.WhereReasonsAre(ChangeReason.Remove)
       .Do(changes => changes.Select(change => change.Current).ForEach(onDefer))
       .Delay(delayPeriod)
       .Synchronize(locker);

       var subscriber = notRemoved.Merge(removes).SubscribeSafe(observer);
       return new CompositeDisposable(subscriber, shared.Connect());

   });
}
In this operator the observable is split into 2 observables, where one part is the adds and updates and the other is the removes. The removed part has a delay applied and when delayed calls back to the consumer.
This operator can now be applied to any dynamic data observable. In our case adjust the observable which we use to load the reactive list and make a DelayRemove call.
//filter, sort and populate reactive list,
var dataLoader = logEntryService.Items.Connect()
                .DelayRemove(TimeSpan.FromSeconds(0.75),proxy =>
                      {
                          //set a property which will start a xaml fadeout storyboard
                          proxy.FlagForRemove();
                          //deselect property other selected brush will be used
                          _selectionController.DeSelect(proxy);
                      })
                 .//more operators to filter and load the list
The xaml for the delay
<Style TargetType="{x:Type ListViewItem}" BasedOn="{StaticResource MetroListViewItem}">
       <Style.Triggers>
       <DataTrigger Binding="{Binding Removing}" Value="True">
           <DataTrigger.EnterActions>
               <BeginStoryboard>
                   <Storyboard>
                       <DoubleAnimation
                               Storyboard.TargetProperty="(TextBlock.Opacity)"
                               From="1.0" To="0.1" Duration="0:0:0.75"/>
                   </Storyboard>
               </BeginStoryboard>
           </DataTrigger.EnterActions>
       </DataTrigger>
   </Style.Triggers>
 </Style>
e) Log count summary
The final feature is a summary of the log count. Yet again. There is nothing new below which has not already been explained above so all I need to say is the following code queries the log entry service and produces an aggregated summary of the different log levels.
//aggregate total items
var summariser = logEntryService.Items.Connect()
      .QueryWhenChanged(query =>
      {
          var items = query.Items.ToList();
          var debug = items.Count(le => le.Level == LogLevel.Debug);
          var info = items.Count(le => le.Level == LogLevel.Info);
          var warn = items.Count(le => le.Level == LogLevel.Warning);
          var error = items.Count(le => le.Level == LogLevel.Error);
          return new LogEntrySummary(debug, info, warn, error);
      })
      .Subscribe(s => Summary = s);
This can now be bound to display a running aggregation of the log level item counts.
4. Integrate Reactive UI into the existing sample dynamic data project
a) Use another IOC container
Reactive UI has it’s own dependency injection mechanism yet my demo application was already set up to use the marvellous structure map. You can if you wish use the built in mechanism for all your registrations but most of us have have our own favourite IOC container. Thankfully ReactiveUI accommodates our choices by exposing an API to allow use of any mechanism.
I found out how to use this API after a quick google search. This custom-structuremap-dependency-resolver-for-reactiveui-5 taught me to implement IMutableDependencyResolver and register it. However this example uses reactive ui 5 and reactive ui 6 now sits on top of Splat, so the registration takes place with Splat.
//create a structure map container
var container =  new Container(x=> x.AddRegistry<AppRegistry>());
//ReactiveUIDependencyResolver implements IMutableDependencyResolver
var resolver =  new ReactiveUIDependencyResolver(container);

//...Register views (see next section)

//register IMutableDependencyResolver
Locator.Current = resolver;
See ReactiveUIDependencyResolver.cs for implementation of IMutableDependencyResolver using structure map.
b) Set up ReactiveUI view hosting
I defer now to this excellent post A GitHub Client with WPF and ReactiveUI Part 2 for the brief and concise explanation of how views are handled using ReactiveUI’s ViewModelViewHost. It taught me everything I need to know to get up an running with the reactive ui way of doing things. Well maybe not everything but it got me off to a running start. So I will not dwell too much on details as I do not wish to replicate that post, but i will briefly explain.
ReactiveUI makes use of a view model host control ViewModelViewHost which exposes a view model dependency property. When some content is bound to the ViewModel property, the dependency resolver resolves the view which is registered via splat.
I created a control with the following definition
<reactiveUi:ViewModelViewHost ViewModel="{Binding Content}"
                        HorizontalContentAlignment="Stretch"
                        VerticalContentAlignment="Stretch"/>
For full xaml RxUiHostView.xaml
The view model which this is bound to RxUIHostViewModel.cs
In demo app, when the view model is required, it is directly resolved and bound to the above xaml. This is where reactive ui takes control. For the view model host to resolve the correct view the dependency resolver must be told what view to use for each view model. This is achieved as followings using the dependency resolver.
//register the log entry view example
resolver.Register(() => new LogEntryView(), typeof(IViewFor<LogEntryViewer>));
This has associated the view and the view model. The view must implement IViewFor which is illustrated next.
c) View to View Model Bindings
Reactive ui provides it’s own binding functionality. I am not too well versed in all of the details so I have not gone the whole hog, but for those who are interested this in the code being my view.
I have set up a few of the bindings using reactive ui bindings for illustrative purposes and the remainder I use wpf bindings.
 public partial class LogEntryView : UserControl, IViewFor<LogEntryViewer>
 {
     public LogEntryView()
     {
         InitializeComponent();

         //use wpf bindings for the data context
         this.WhenAnyValue(x => x.ViewModel).BindTo(this, x => x.DataContext);

         //use rx ui binding for the search text box and delete command
         this.Bind(ViewModel, model => model.SearchText, view => view.SearchTextBox.Text);
         this.OneWayBind(ViewModel, model => model.DeleteCommand, view => view.DeleteButton.Command);
         //should be able to bind to a command as follows but for some reason it kept throwing, so I quickly qave up!
          //  this.BindCommand(ViewModel, model => model.DeleteCommand, view => view.DeleteButton);
     }

     public static readonly DependencyProperty ViewModelProperty = DependencyProperty.Register(
         "ViewModel", typeof (LogEntryViewer), typeof (LogEntryView), new PropertyMetadata(default(LogEntryViewer)));

     public LogEntryViewer ViewModel
     {
         get { return (LogEntryViewer) GetValue(ViewModelProperty); }
         set { SetValue(ViewModelProperty, value); }
     }

     object IViewFor.ViewModel
     {
         get { return ViewModel; }
         set { ViewModel = (LogEntryViewer)value; }
     }
 }
If anyone wants to change the bindings for this screen to completely use rx ui bindings, please be my guest. Make the changes in github and submit a pull request. Thanks!
5. That’s all folks
Both dynamic data and ReactiveUI are functionally very rich and this article only touches the surface of both but I believe the code in this example will be a good starting point for anyone wishing to find out about either of these libraries.

Hi. How would you implement “refresh” feature, so that the Cache would be rebuilt? Currently i’m trying to do it by executing the following Action:
this._refresh = () =>
{
cache.Edit(innerCache =>
{
innerCache.Clear();
innerCache.AddOrUpdate(this._orderService.GetAllOrders());
});
};
This actually works, but when using with DelayRemove, the items are removed after the DelayRemove delayPeriod.
So basically I want to disable delayremove while a refresh is being done. Any suggestions?
LikeLike
You can use the EditDiff() operator.
There is an active community on slack https://reactivex.slack.com where we can discuss how to use the operator
LikeLike
I’m not too familiar with Slack. How can I join?
LikeLike
The link should give you an option to sign up. Dynamic Data has a dedicated sub channel.
If you get any issues signing up, send me an email (address on dynamic data home page on GitHub) and I will manually invite you
LikeLike